How to Take Out Keyboard Switches Without a Tool (5 Safe Methods)
Published: 15 May 2026
Learning how to take out keyboard switches without a tool is easier than most people think. If your switch puller is missing, or you never bought one, you can still replace or fix a switch on a hot-swap keyboard using things you already have at home, like a paperclip, a bobby pin or two toothpicks.
This guide explains how to check whether your keyboard is hot-swap, which household items work best, five step-by-step methods, and how to avoid bent pins and damaged sockets. Read the first section before you touch any switch, because one wrong assumption can ruin a keyboard. If you are new to this topic, you can also browse our keyboard switches guides for more help.
Quick answer: Unplug the keyboard, remove the keycap, press both locking clips on the switch at the same time with a bent paperclip or bobby pin, and pull the switch straight up. This works only on hot-swap keyboards. Never try it on a soldered board.
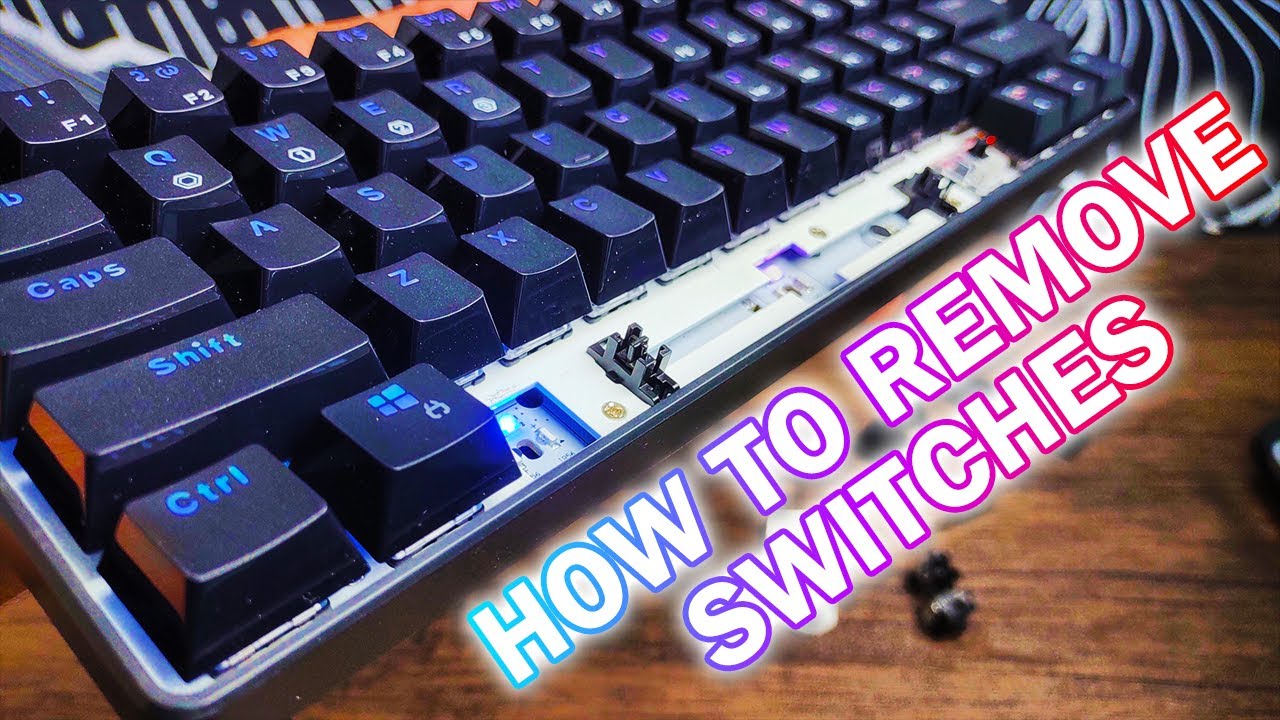
Before You Start: Hot-Swap vs Soldered Keyboards
This is the most important thing to know before you touch anything.
Hot-swap keyboards hold each switch in a socket. There is no glue, no solder and no permanent connection, so you can pop switches in and out freely. These are the only boards where you can safely remove switches without special equipment.
Soldered keyboards are different. The switch pins are melted directly onto the PCB (the circuit board inside). You cannot remove these switches without a soldering iron and a desoldering pump. Pulling them out by force will lift the copper pads and can damage the board permanently.
| Feature | Hot-Swap Keyboard | Soldered Keyboard |
|---|---|---|
| How switches are held | Pressed into sockets | Fused to the PCB with solder |
| Removal without a tool | Possible with care | Not possible |
| Tools needed | Puller or household item | Soldering iron and desoldering pump |
| Risk of damage | Low if done correctly | High, lifted pads and broken traces |
| Best for | Beginners and switch testers | Permanent builds |
Switch type also changes how a keyboard feels and sounds. If you are comparing common options, read our guide to Blue vs Red Switch Keyboards for the difference in feel, sound and use.
How to Tell Which One You Have
Use these checks in order, from easiest to hardest:
- Check the product listing or manual. Most modern budget and enthusiast boards clearly say hot-swap in their features. Search your exact model name and the word hot-swap on Google.
- Remove one keycap and look inside the switch area. On a hot-swap board you can see that the switch sits in a socket on the PCB.
- Check the underside of the PCB. This needs you to open the case, so only do it if you already know how. Soldered boards show small silver blobs (solder points) where the pins are fused. Hot-swap boards show plastic or metal sockets under the switch positions.
Popular hot-swap boards include the Keychron K-series, many Royal Kludge boards and many Akko keyboards. In Pakistan, many budget keyboards sold in local markets and online stores are soldered, including some popular gaming models, so always check your exact model number before you try anything.
Important: Every method in this guide is for hot-swap keyboards only. If your board is soldered, stop here and use a desoldering kit or take it to a professional.
Safety Checklist Before You Remove Any Switch
Take one minute to do this. It prevents most problems.
- Unplug the keyboard. Disconnect the USB cable or turn off Bluetooth and the battery switch. A metal paperclip touching a powered board can cause a short circuit.
- Touch a metal object first. Touch an unpainted metal part of your desk or PC case to discharge static before you handle the board.
- Use a flat, stable surface. Do not work with the keyboard on your lap or tilted.
- Use good light. The clip slots are small. A phone flashlight helps a lot.
- Take a photo of the layout. If you plan to swap many switches, a photo helps you remember what goes where.
What You Need (No Store Trip Required)
You probably already have one of these at home.
| Item | Best Use | Difficulty | Risk |
|---|---|---|---|
| Paperclip | Best all-round substitute for a switch puller | Easy | Low |
| Bobby pin or hair pin | Boards with extra space between keys | Easy | Low |
| Two toothpicks | When you have no metal items nearby | Hard | Medium |
| Earring post or sewing pin | Removing only one or two switches | Hard | Medium |
| Fine-tip tweezers | Straightening bent pins after removal | Medium | Low |
| Fingertips only | Loose, easy switches on some boards | Medium | Medium |
A spoon handle can help lift a stiff keycap, but it can scratch the keycap or crack its stem. A wire keycap puller or your fingers is safer. Do not use knives or screwdrivers on the switch. They slip easily and can scratch the plate or the PCB.
That is all you need. No online order and no waiting for delivery.
Method 1: The Paperclip Method
This is the closest thing to using a real switch puller. A bent paperclip copies the tool almost perfectly.
Step 1: Remove the Keycap First
Before touching the switch, remove the keycap on top of it. Grip the keycap between your thumb and index finger and pull straight up. It should come off easily. If it is stiff, rock it gently from side to side while you pull.
Once the keycap is off, you will see the switch body and the small clip slots on its housing.
Step 2: Shape Your Paperclip
Straighten most of the paperclip, then bend it into a U shape so that two parallel prongs stick out. The gap between the prongs should roughly match the width of the switch housing, which is about 14 to 15 mm on MX-style switches.
Both prongs must be the same length, about 5 to 7 mm. If one prong is longer, the clips will not release evenly.
Step 3: Place Both Prongs on the Clips at the Same Time
This is the critical step. Look at the switch housing. On most MX-style switches, the two plastic clips that lock the switch into the plate are on the top and bottom edges. On some switches they are on the left and right sides. Check your own switch before you start.
Place both prongs on the clip slots at the same moment and press inward. You will feel light resistance, and then both clips will release. Some switches give a small click when they let go.
Step 4: Pull Straight Up
Keep both prongs pressed in and pull the switch straight up. Use a slow, steady motion, not a jerk. The switch should slide out cleanly.
If it does not come out smoothly, do not force it. Let go, reseat the prongs and try again. Forcing a switch that is still clipped will bend the pins.
Tip: Test this method on one switch near the edge of the board first. Once you feel how the clips release, the rest are easy.
Method 1: How to Take Out Keyboard Switches Without a Tool Using a Paperclip
A bobby pin works almost like a paperclip. It already has two parallel arms, which makes it convenient, although the arms can be slightly too wide for some switches.
- Open the bobby pin fully so both arms are parallel.
- If the gap is too wide, pinch it slightly so both tips fit on the clip slots.
- Place both tips on the clips at the same time.
- Press inward and pull the switch straight up.
Bobby pins work especially well on keyboards with more space between keys.
Method 3: Two Toothpicks
This method needs more coordination, but it is a solid option when you do not have metal items nearby.
- Hold one toothpick in each hand.
- Position the tip of each toothpick on one of the two clips.
- Press both inward at exactly the same moment.
- While both clips are pressed, use your fingers to lift the switch body upward.
The tricky part is timing. If you press one side before the other, the switch stays locked. Go slowly and make sure both tips are seated before you press. Wooden toothpicks can snap, so use fresh ones.
Method 4: Earring Post or Thin Pin
If you only need to remove one or two switches and you have an earring or sewing pin nearby, this can work too.
- Use the thin post of an earring or the point of a pin to press one clip inward.
- While holding that clip down, press the other clip with a second pin.
- Once both clips are pressed, lift the switch with your fingernails.
It takes patience, but the result is the same as any other method.
Method 5: Fingertips Only
On some hot-swap boards, you can remove a switch with your fingers alone. Pinch the switch body at its two clip edges, squeeze gently and lift straight up while wiggling slightly from side to side. Wiggle, do not twist, because twisting bends pins.
This works best on switches that fit loosely and on keyboards with plenty of space around each key. If your fingers slip or the switch feels tight, stop and use Method 1 instead. Wrapping a rubber band around your fingertips can improve grip.
Which Method Should You Choose?
| Method | Difficulty | Risk to Switch | Best For |
|---|---|---|---|
| Paperclip | Easy | Low | Most hot-swap keyboards |
| Bobby pin | Easy | Low | Boards with wider key spacing |
| Two toothpicks | Hard | Medium | When you have no metal items |
| Earring post or pin | Hard | Medium | Removing only one or two switches |
| Fingertips only | Medium | Medium | Loose switches with open space around them |
If you are not sure, start with the paperclip method. It gives the best control for the lowest risk.
Common Mistakes to Avoid
Most people damage their keyboard not because they used the wrong tool, but because they made one of these mistakes. If noise is one of the reasons you are replacing your switches, you may also want to explore the best silent keyboard switches for quieter typing and gaming.
Pressing Only One Clip at a Time
This is the most common error. If you release only one clip and then pull, the switch resists and can snap sideways, bending the pins. Both clips must release together before you lift the switch.
Tilting the Switch While Pulling
The pins at the bottom of the switch are thin and fragile. Pulling at an angle bends them, and bent pins may not seat properly in the socket again. Always pull perfectly straight up.
Skipping Keycap Removal
Some people try to remove the switch with the keycap still on. This adds height and makes it almost impossible to reach the clips. Always remove the keycap first.
Using Too Much Force
Hot-swap switches are designed to come out without serious effort. If you are struggling, either the clips are not fully released or the board is soldered. More force is never the answer.
Working on a Powered Keyboard
A metal tool touching a keyboard that is still connected can cause a short circuit. Always unplug the keyboard first.
3-Pin vs 5-Pin Switches: Check Before You Install a New One
If you are removing a switch to replace it, check the pin type before you buy.
- A 3-pin switch has one center post and two metal contact pins.
- A 5-pin switch has the same three parts plus two extra plastic alignment legs.
Many hot-swap boards accept both types, but some have holes for only three pins. In that case, a 5-pin switch will not sit flat. You can snip the two extra plastic legs with a nail clipper or flush cutters. This does not change how the switch feels. Only cut the plastic legs, never the metal pins.
Also make sure the new switch is a standard mechanical switch. Optical, magnetic and low-profile switches are not interchangeable with regular hot-swap sockets.
What to Do After You Remove the Switch
Once the switch is out, you have a few minutes of easy access to the socket.
- Inspect the pins. Look at the two metal pins on the bottom of the switch. If one is bent, hold the switch carefully and straighten it with fine-tip tweezers.
- Clean the socket area. Dust is common in many homes and offices in Pakistan, and it collects under keycaps. Blow it out gently or use a soft brush.
- Seat the new switch straight. Line up the pins with the socket holes and push down evenly. It should slide in easily.
- Test before replacing the keycap. Press the switch with a tool or open a keyboard tester to confirm the key registers.
Troubleshooting: Problems After a Switch Swap
| Problem | Likely Cause | Fix |
|---|---|---|
| Key does nothing | Bent pin | Remove the switch, straighten the pin with tweezers and reseat it straight |
| Switch will not sit flat | 5-pin switch in a 3-pin board, or dust in the socket | Clip the plastic legs or clean the socket |
| Switch will not come out | Clips not fully released, or the board is soldered | Reseat the tool, check your keyboard type, never force it |
| Key types twice | Faulty switch or loose socket | Swap with a known good switch to see which one causes it |
| Switch feels loose after install | Socket worn from many swaps | Try a different switch or consider a socket repair |
Pro Tips for a Smooth Experience
- Work in good lighting: A phone flashlight pointed at the keyboard makes the clip slots much easier to see.
- Lay the keyboard flat: A flat, stable surface gives you better control.
- Place a soft cloth under the keyboard: If a switch falls and bounces on a hard desk, the housing can crack. A cloth or mousepad prevents that.
- Keep removed switches in order: Lay them out in a grid that matches the keyboard so reassembly is simple.
- Remove only what you need: Every swap puts a little wear on the socket, so do not pull switches without a reason.
- Work slowly: There is no rush. Slow and deliberate always beats fast and careless.
When You Should Buy a Switch Puller
Household items are fine for a one-time swap. If you plan to change switches often, a dedicated switch puller is worth it. It costs only a few dollars, and Pakistani online stores such as Daraz list it in PKR, so check the current price before you buy. A proper puller presses both clips evenly every time, which lowers the risk of bent pins and worn sockets.
Final Thoughts
Removing keyboard switches without a tool is not complicated once you understand how the clips work. A paperclip is free, it is in most homes, and it does the job almost as well as a real puller.
The one thing that separates a clean removal from a damaged board is patience. Confirm your keyboard is hot-swap, unplug it, press both clips together and pull straight up. Do that and your keyboard will thank you.
10. FAQs
Yes, on any hot-swap keyboard. A bent paperclip or bobby pin works almost like a real switch puller. The key is pressing both side clips at the same time and pulling straight up.
Yes, if you unplug the keyboard first and press both clips evenly. Problems happen when people press only one clip, pull at an angle or use force.
Check the product page or manual for the word hot-swap. You can also search your exact model name online. If you open the case, soldered boards show solder points under the switches, while hot-swap boards show sockets.
No. Soldered switches are fused to the PCB. Pulling them out by force lifts the copper pads and can ruin the board. You need a soldering iron and a desoldering pump, or you can switch to a hot-swap keyboard.
Stop and check that both clips are fully released. Reseat your tool and try again. If it still does not move, your keyboard may be soldered. Do not force it.
Yes. The keycap covers the clips and adds height, so the switch is almost impossible to remove with the keycap still on.
It depends on the socket brand and quality. Every swap adds a little wear, so remove switches only when you need to and always pull straight up.




- Be Respectful
- Stay Relevant
- Stay Positive
- True Feedback
- Encourage Discussion
- Avoid Spamming
- No Fake News
- Don't Copy-Paste
- No Personal Attacks
- Be Respectful
- Stay Relevant
- Stay Positive
- True Feedback
- Encourage Discussion
- Avoid Spamming
- No Fake News
- Don't Copy-Paste
- No Personal Attacks
